How to Use Image Intensifier Fluoroscopy Effectively?
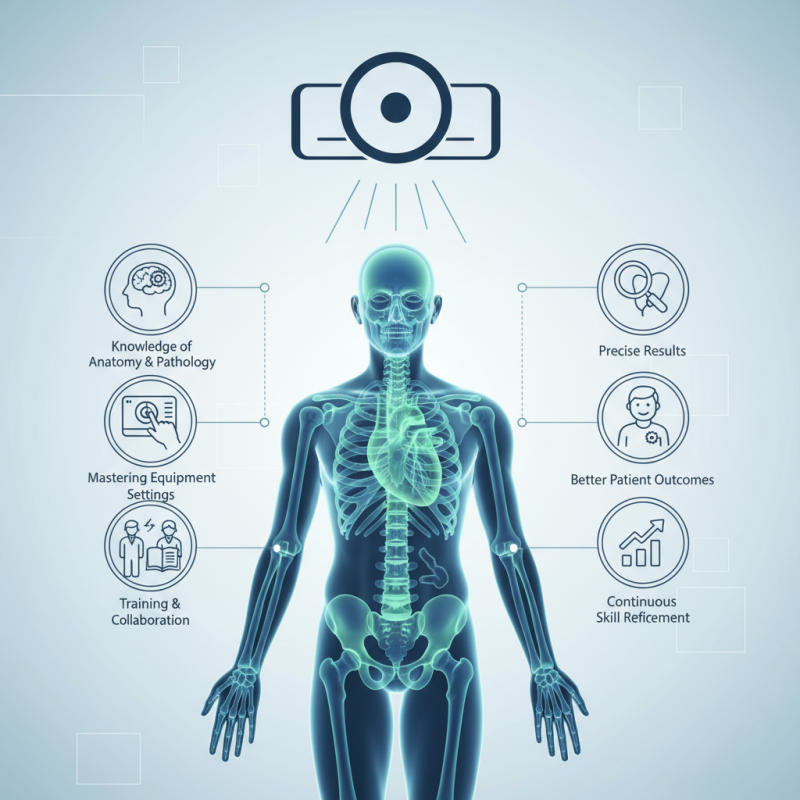
In the realm of medical imaging, using Image Intensifier Fluoroscopy effectively is crucial for achieving precise results. Dr. John Smith, a leading expert in radiology, once said, "Mastering Image Intensifier Fluoroscopy ensures better patient outcomes." This highlights the importance of understanding the tool's capabilities.
Yet, many practitioners still struggle with its application. The complexity of settings can lead to suboptimal images. Operators may overlook adjustments, resulting in missed diagnoses. Familiarity with the technology can truly enhance its effectiveness. Practitioners should strive to refine their skills continuously.
Understanding the anatomy and pathology being examined is equally important. Effective use of Image Intensifier Fluoroscopy requires a solid foundation in anatomical knowledge. By seeking training and engaging in collaborative practices, radiologists can improve the accuracy and speed of their imaging processes. Embracing the learning curve can transform challenges into opportunities for growth.
Understanding Image Intensifier Fluoroscopy Basics
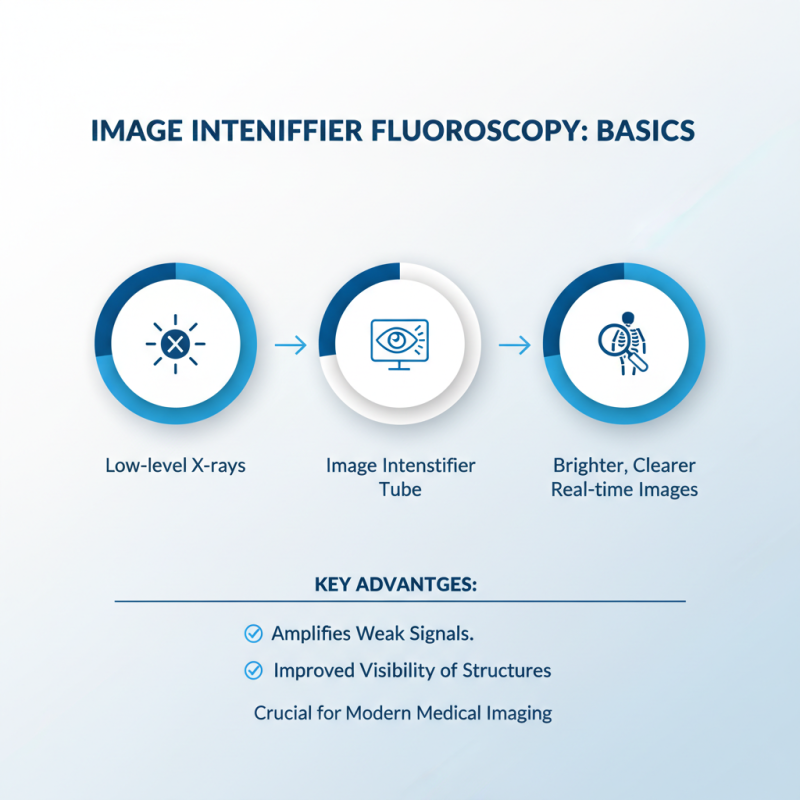
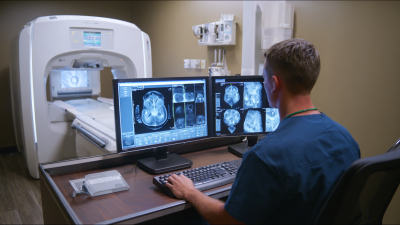
Image intensifier fluoroscopy is a valuable tool in modern medical imaging. Understanding its basics is crucial for effective use. This technology amplifies low-level x-rays, improving visibility of structures in real time. The image intensifier captures the x-rays and converts them into brighter, clearer images.
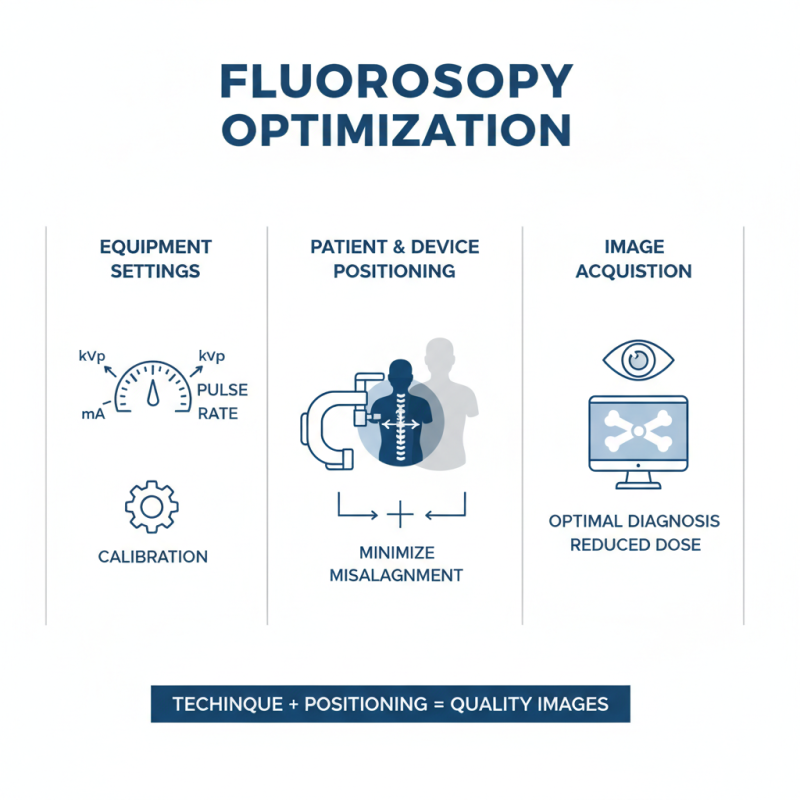
Tips: Always check the calibration before use. Even slight inaccuracies can lead to misinterpretation. Positioning of the patient is vital too. Make sure the area of interest is well centered. This minimizes unnecessary exposure to other body parts.
Lighting also plays a role in image quality. Ensure that the surrounding environment is adequately lit. However, avoid glare on the imaging surface. The balance is important; too much light can wash out details. Consider using shields to reduce distractions and enhance focus on the image.
There's always room for improvement in technique. Operators should regularly assess their workflow. Are the images consistently clear? Is patient comfort being prioritized? Reflecting on these questions can lead to better outcomes. Fine-tuning these small elements can make a significant difference in using image intensifier fluoroscopy effectively.
Key Components of Image Intensifier Systems
Image intensifier systems are vital in fluoroscopy. They enhance the visibility of internal structures during procedures. The key components include the input phosphor, the photocathode, and the output phosphor. The input phosphor converts X-rays into visible light. This initial step is crucial, as the quality of this conversion affects overall image clarity.
Research indicates that image intensifiers can increase brightness by up to 10,000 times. This allows for better visualization of anatomical details. However, not all systems perform equally. Some may produce excessive noise or artifacts. An understanding of how to align these components optimally can lead to better patient outcomes.
Despite advancements, challenges remain. For instance, maintaining balance between image quality and radiation dose is essential. Operators often face the dilemma of using increased radiation for superior images. Educational workshops and hands-on training can help address these shortcomings. By focusing on these components and their impact, we can improve the effectiveness of image intensifier fluoroscopy.
Usage of Image Intensifier Fluoroscopy in Medical Imaging
Strategies for Reducing Radiation Exposure
Fluoroscopy is a powerful imaging tool, but it comes with radiation risks.
Reducing exposure is crucial for both patients and healthcare providers.
One effective strategy is optimizing the fluoroscopy settings.
Adjusting the beam's intensity can significantly lower radiation levels.
Aim for the lowest dose necessary for each procedure.
Real-time monitoring can help identify settings that need adjustment.
Proper positioning of patients is also essential. Keeping the area of interest close to the image intensifier minimizes radiation spread.
It can be challenging to achieve optimal positioning, especially in complicated cases.
Practitioners must communicate clearly with patients to ensure they remain still during procedures.
Moreover, using protective equipment can help mitigate radiation exposure.
Lead aprons are a common choice but can interfere with imaging on occasion.
Consider the balance between safety and clear visuals. Regular training on best practices and equipment use is vital.
Reflecting on past procedures can reveal opportunities for improvement in radiation safety protocols.
Troubleshooting Common Issues in Fluoroscopy
Fluoroscopy is a valuable tool in medical imaging, yet common issues can arise during its use. A report from the Radiological Society of North America indicates that improper positioning of the patient is a frequent challenge. This can lead to repeating images, increasing radiation exposure and delaying procedures. Ensuring proper alignment and comprehension of patient anatomy can mitigate these risks, improving both efficiency and safety in fluoroscopy.
Another common issue is the calibration of equipment. A study published in the Journal of Clinical Radiology found that 20% of equipment used had unapproved settings. Miscalibrated machines can produce inadequate images, leading to misdiagnoses. Regular checks and adherence to recommended protocols are essential for the accuracy of the imaging process. Technologists must consistently monitor equipment performance to ensure reliable outcomes.
Communication with patients also plays a critical role. Many patients are unaware of the procedure's requirements, which can affect image quality. Clear instructions can enhance cooperation, leading to better positioning and fewer repeat images. It is vital to create an informative environment to reduce anxiety and build trust. This approach not only improves workflow but ultimately impacts patient care.
How to Use Image Intensifier Fluoroscopy Effectively? - Troubleshooting Common Issues in Fluoroscopy
| Issue |
Possible Causes |
Solutions |
| Poor Image Quality |
Incorrect settings, inadequate illumination, or malfunctioning equipment. |
Adjust settings, check light source, or service equipment. |
| Ghosting or Artifacts |
Motion during imaging or improperly calibrated system. |
Minimize patient movement, recalibrate system. |
| Excessive Radiation Exposure |
Incorrect patient positioning, prolonged exposure time. |
Reassess positioning, optimize exposure time. |
| Flickering Images |
Power fluctuations or inadequate power supply. |
Check power supply, use a UPS if necessary. |
| Delayed Image Display |
Slow processing software or hardware issues. |
Upgrade software, check hardware components. |